
Last week I spent some time running some fabric through my sewing machine. I was literally just seeing what each stitch looked like and experimenting with the speeds of the machine. I learned a lot, which is helpful, but now I have this useless piece of material that is covered in many different lines going in multiple directions. I can’t use it for anything.
So this week I am taking a more pragmatic approach. I have cut out two and a half inch strips that I will sew together. I plan on using a 1/4″ seam. This will allow me to practice making a seam and help me create blocks that I can use down the road.
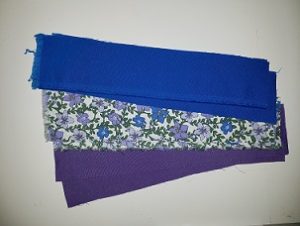 Measuring out material is time consuming work. This is just a small sampling of the amount of strips I cut out, but it was worth taking the time to prep them.
I am still acquiring certain tools, like a rotary cutter, so my strips aren’t perfectly straight. I had to eyeball it with my scissors, but I think I did a decent job.
After the strips were cut I set up my sewing machine. I used the Ideal Seam Gauge to line up my Ideal Seam Guide. I was able to set an exact 1/4″ allowance to give me an exact 1/4″ seam.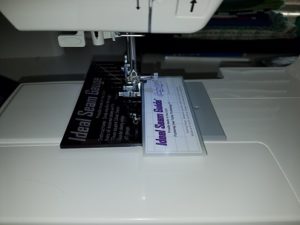
After the Guide was lined up I was ready to set to work sewing my strips. I decided to put them together in groups of five so that I would end up with 10″ squares that I can use at a later date down the line. I had a limited amount of purple material so I was only able to make them 10″ long. I don’t even know what size a typical block quilt would use. 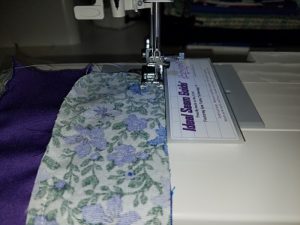 If I were to do a block quilt, how big would the blogs typically be?
The edges of my strips aren’t perfectly straight so I had to pick a layer to follow along the guide, but I am very happy with my first attempts. I ended up completing eight different squares in one sitting. Each square has its own unique pattern as far as the colors that I used. 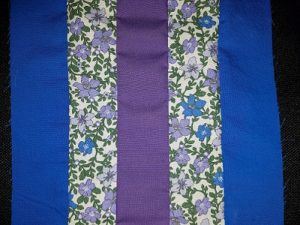
I know that it’s not perfect. I know that in a few months I’ll look back on these squares and cringe at the little mistakes that I made and the slight angles that the lines take, but for now I’m pretty tickled.
Recent Comments